
Uploading Files
As noted here, integrations with systems like Encompass, VIP, and EOSTAR automatically import invoices via FTP or AS2 methods. In addition, you can upload files manually:
💡 If you don't want to manually upload invoices, please reach out to Fintech's Client Support team to explore integration options.
⚠️ Only files in CSV or .txt format can be uploaded. Ensure the file name only contains letters, numbers, underscores, and/or periods - the system will not accept files with names that include special characters.
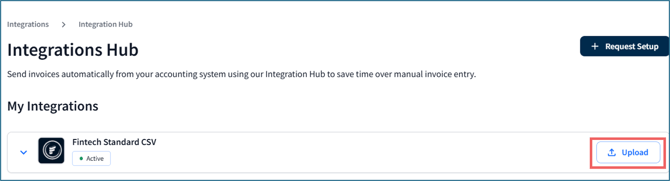
- In My Integrations, click Upload for the back-office system you use. You can have multiple back-office systems:
- Drag and drop the file or click the Browse Files button. Only 1 file can be uploaded at a time:
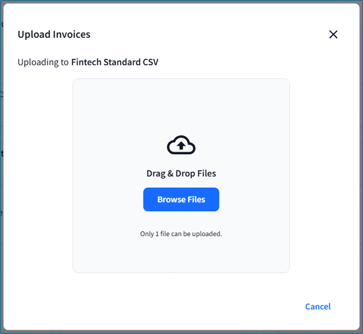
- When uploaded, click the Done button to close the window. The file will begin converting to the format you selected. This can take anywhere from several seconds up to 10 minutes, depending on file size.

- Invoices successfully converted and validated will be sent to your retailer account for payment. Navigating to other screens within the Vendor Portal will not disrupt the validation process.
Upload Errors and Getting Help
Errors can be due to invalid file formats, invalid file names, missing information - customer number, product information, dates, invoice number - or if a relationship with a customer has not gone live yet (or became inactive for any reason).
Uploading an invoice file that is not in CSV or .txt format (for example: a PDF file) will trigger a Format Invalid error message. Uploading an invoice with a file name that includes special characters will fail - only letters, numbers, underscores and periods are accepted in the file name.
Other errors may be due to duplicated invoices or when the number of invoices (or dollar amount) do not add up correctly.
💡 Curious about the reason for an error? Read more about how to view file details here: What does the Integrations File History tab tell me?
After a second failed attempt to upload a file, you will receive a message asking if you wish to message Client Services by clicking the Contact Support button:

Clicking the Send button in the Contact Us window will send the following information to Client Services:
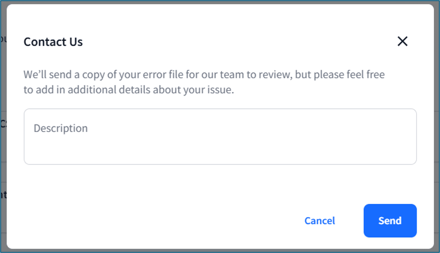
- Error report
- File name
- File size
- File format (CSV, Excel, etc.)
- Distributor name
- FTS ID
- First and Last name of the user who contacted support.
- Email address of the user who contacted support.
💡 This email sends an error file along with the information listed above. It will not include the original file you tried to upload. The support team may reach out to you for the original file for testing on their end.
After sending your email, the Contact Support banner will remain at the top of your Integrations Hub screen for the rest of your session in Vendor Portal.
Monitoring Uploads
Click the chevron under My Integrations to check the invoice processing and validation progress:
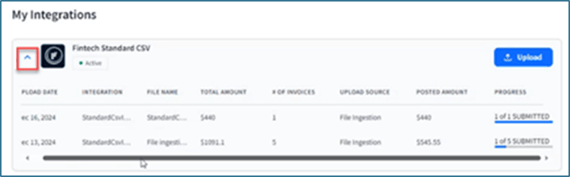
The table shows the most recently uploaded files for the integration and includes key information including date of upload, integration type and source, and the upload progress for invoices.
Submitted refers to how many invoices in this file have passed validation and were submitted to the retailer. For example, if this column shows 1 of 5 SUBMITTED, then the invoices could still be processing, or four of the invoices did not pass validation.